HTPC / Home Backup: MDADM, RAID6, LVM, XFS, CIFS and NFS
In this post we'll take a look at setting up a 4TB storage, HTPC, and active backup using basic components that can be bought from the local PC store and freely available software. Here I set out to try and consolidate my storage to something central running RHEL Linux (Or a clone, such as the Scientific Linux that's freely available) that could also serve as a makeshift entertainment center in replacement of my current one. In other words, upgrade my HTPC and turn it into an HTPC+B, if you will, with the following statistics:
4TB usable storage (6TB HDD – 2 HDD for RAID6).
XFS Filesystem
317MB/s WRITES.
300 MB/s READS.
A Wireless N card + 1GIG ETH in a bonding configuration. (Redundancy in case of failure)
Scientific Linux 6.1 (RHEL 6.1).
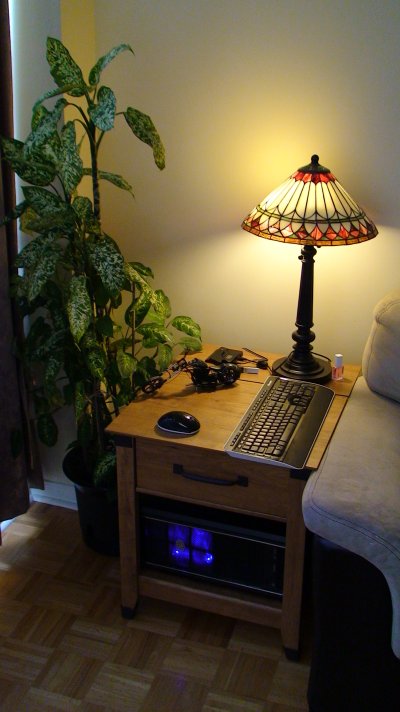
When it's all said and done then shared with the rest of the network , including a new Nexus 7 running Android through AndSMB, and tweaked for quick data transfers it should make a nice subtle addition to the decor as well. ( And yes, it is also very very quiet ):
So here is what a goal would be to achieve with this central storage server:
HTPC: Have it function as a media center.
Backup. (Single drives backed up to a RAID 6 setup within the same box)
File Server (NFS, CIFS, Mountable from my other windows systems etc)
Flash storage center for the most critical files.
(Optional) Authentication server using something like kerberos.
There are a few good posts out there that would suggest or argue against using RAID, but I still need a backup. The other thing that I wanted to do is to find out how reliable this thing could be. (As we'll see, it turned out to be quite an eye opener.) A good read as well is the Triple Parity RAID and Beyond article.
So why not use a store baught backup solution?
That seamed like a good idea sometime back if it were not an episode a colleague of mine had with one of those. Based on the noises and symptoms he describes as one having while he couldn't access his data was enough for me. The other reason is recoverability and supportability options one has if trouble does occur. So this brings us to the most real question here:
What is a backup in the true sense given today's technology?
This is a loaded question and there's no right or wrong answer. With today's estimates that neither RAID5 nor RAID6 would be enough in the upcoming years (see the link above), the word backup would appear to start to take on the meaning: Storage media that would be available when needed to restore a copy from rather then storage that would hold a copy of my data. At first glance there doesn't appear to be a difference yet the first statement doesn't suggest a promise that the backup would be there at all. YMMV or YOMV.
So what does that mean for RAID 6? Let's illustrate with an example given the following to determine the likelihood of an unrecoverable data failure:
A home laptop (contains one HDD)
The HTPC+B setup (contains 6 HDD in a RAID 6 configuration)
If my laptop is being backed up to my HTPC+B server, the point at which one would loose data is when both the laptop HDD and 3 of the RAID 6 disks failed at the same time. So in essence, a 4 disk failure at the same time which is highly unlikely. So what this means is that, which would be more likely, when my laptop disk fails, my HTPC+B would likely still be around for me to restore from. Likewise, if my backup fails, my PC would still be running along fine long enough to fix up my backup outage. In either case, I would still have my data.
The flipside of the argument would suggest that the more hardware in a configuration, the more maintenance it would require over the same time frame.
Setup Summary:
A quick note. The hardware used here is a combination of old and new and where price was right vs other options. Other hardware should work just as well but your mileage may vary and my pocket book isn't that deep at all:
LS ULTRA 600W ATX Power Supply (Reused from another PC)
GA-890XA-UD3 Motherboard ( 333 – SATA 3, USB Power 3.0, USB 3.0). 6x SATA 3 for our software RAID 6.
Seagate 1TB Green Barracuda HDD x 6 ( ST31000520AS )
( Optional – Failed drive replacement ) Barracuda® Green SATA 6Gb/s 1.5TB Hard Drive ( ST1500DL003 )
A Western Digital Caviar Green drive ( WD15EADS ) for the root FS.
For this setup, the motherboard is the most powerful item I got. Lot's of room for upgrades here as a result. I wasn't looking to break the bank and at about $50 per HDD in Aug of 2011, it made perfect sense, before a certain flood in Thailand. I hope cheap doesn't transfer to the hardware but only time will tell. All hooked up, it looked like this:
( NOTE: The makeshift fan under the video card PCI card. Turned out the heatsink of the AMD RADEON was getting too hot even though it is sold as a fanless GPU. )
Once the hardware is hooked up, it's time for the software. The steps below are the base commands I needed after a rather lengthy, trial and error setup of the HTPC+B:
ITEM #:
DESCRIPTION
COMMAND(S)
1
Enable HOT-SWAP in BIOS.
The below will enable HOT PLUG in BIOS. Enter BIOS and enable the following:
OnChip SATA Type = AHCI
OnChip SATA Port 4/5 Type = As SATA Type
Once this is set, removing and readding SDD devices has the following effect:
DISCONNECT MESSAGES:
Oct 23 10:48:01 mbpc kernel: ata6: exception Emask 0x10 SAct 0x0 SErr 0x90202 action 0xe frozen
Oct 23 10:48:01 mbpc kernel: ata6: irq_stat 0x00400000, PHY RDY changed
Oct 23 10:48:01 mbpc kernel: ata6: SError: { RecovComm Persist PHYRdyChg 10B8B }
Oct 23 10:48:01 mbpc kernel: ata6: hard resetting link
Oct 23 10:48:02 mbpc kernel: ata6: SATA link down (SStatus 0 SControl 300)
Oct 23 10:48:07 mbpc kernel: ata6: hard resetting link
Oct 23 10:48:07 mbpc kernel: ata6: SATA link down (SStatus 0 SControl 300)
Oct 23 10:48:07 mbpc kernel: ata6: limiting SATA link speed to 1.5 Gbps
Oct 23 10:48:12 mbpc kernel: ata6: hard resetting link
Oct 23 10:48:13 mbpc kernel: ata6: SATA link down (SStatus 0 SControl 310)
Oct 23 10:48:13 mbpc kernel: ata6.00: disabled
Oct 23 10:48:13 mbpc kernel: ata6: EH complete
Oct 23 10:48:13 mbpc kernel: ata6.00: detaching (SCSI 5:0:0:0)
Oct 23 10:48:13 mbpc kernel: sd 5:0:0:0: [sda] Synchronizing SCSI cache
Oct 23 10:48:13 mbpc kernel: sd 5:0:0:0: [sda] Result: hostbyte=DID_BAD_TARGET driverbyte=DRIVER_OK
Oct 23 10:48:13 mbpc kernel: sd 5:0:0:0: [sda] Stopping disk
Oct 23 10:48:13 mbpc kernel: sd 5:0:0:0: [sda] START_STOP FAILED
Oct 23 10:48:13 mbpc kernel: sd 5:0:0:0: [sda] Result: hostbyte=DID_BAD_TARGET driverbyte=DRIVER_OK
CONNECT:
Oct 23 10:49:10 mbpc kernel: ata6: exception Emask 0x10 SAct 0x0 SErr 0x40d0002 action 0xe frozen
Oct 23 10:49:10 mbpc kernel: ata6: irq_stat 0x00000040, connection status changed
Oct 23 10:49:10 mbpc kernel: ata6: SError: { RecovComm PHYRdyChg CommWake 10B8B DevExch }
Oct 23 10:49:10 mbpc kernel: ata6: hard resetting link
Oct 23 10:49:10 mbpc kernel: ata6: SATA link up 3.0 Gbps (SStatus 123 SControl 300)
Oct 23 10:49:10 mbpc kernel: ata6.00: ATA-8: ST31000520AS, CC32, max UDMA/133
Oct 23 10:49:10 mbpc kernel: ata6.00: 1953525168 sectors, multi 16: LBA48 NCQ (depth 31/32)
Oct 23 10:49:10 mbpc kernel: ata6.00: configured for UDMA/133
Oct 23 10:49:10 mbpc kernel: ata6: EH complete
Oct 23 10:49:10 mbpc kernel: scsi 5:0:0:0: Direct-Access ATA ST31000520AS CC32 PQ: 0 ANSI: 5
Oct 23 10:49:10 mbpc kernel: sd 5:0:0:0: Attached scsi generic sg0 type 0
Oct 23 10:49:10 mbpc kernel: sd 5:0:0:0: [sda] 1953525168 512-byte logical blocks: (1.00 TB/931 GiB)
Oct 23 10:49:10 mbpc kernel: sd 5:0:0:0: [sda] Write Protect is off
Oct 23 10:49:10 mbpc kernel: sd 5:0:0:0: [sda] Write cache: enabled, read cache: enabled, doesn't support DPO or FUA
Oct 23 10:49:10 mbpc kernel: sda: unknown partition table
Oct 23 10:49:10 mbpc kernel: sd 5:0:0:0: [sda] Attached SCSI disk
2
(Optional) Setup UDEV rules for the newly installed SDD devices.
Follow the link LINUX: Persistent naming of SATA devices through UDEV rules to potentially setup UDEV naming rules for the RAID 6 devices. This will help with the rest of the steps and uniquely name the RAID6 devices we'll be working with and using in various commands.
3
Start another session to monitor /var/log/messages before we create the array using mdadm.
Before we create the array, we want to be monitoring the log files. The result of the creation in the next step is:
# tail -f /var/log/messages
Jan 30 00:22:17 mbpc kernel: md: bind<sdf>
Jan 30 00:22:17 mbpc kernel: md: bind<sde>
Jan 30 00:22:17 mbpc kernel: md: bind<sdd>
Jan 30 00:22:17 mbpc kernel: md: bind<sdc>
Jan 30 00:22:17 mbpc kernel: md: bind<sdb>
Jan 30 00:22:17 mbpc kernel: md: bind<sda>
Jan 30 00:22:17 mbpc kernel: async_tx: api initialized (async)
Jan 30 00:22:17 mbpc kernel: xor: automatically using best checksumming function: generic_sse
Jan 30 00:22:17 mbpc kernel: generic_sse: 3260.000 MB/sec
Jan 30 00:22:17 mbpc kernel: xor: using function: generic_sse (3260.000 MB/sec)
Jan 30 00:22:17 mbpc kernel: raid6: int64x1 687 MB/s
Jan 30 00:22:17 mbpc kernel: raid6: int64x2 960 MB/s
Jan 30 00:22:17 mbpc kernel: raid6: int64x4 718 MB/s
Jan 30 00:22:17 mbpc kernel: raid6: int64x8 625 MB/s
Jan 30 00:22:17 mbpc kernel: raid6: sse2x1 1210 MB/s
Jan 30 00:22:17 mbpc kernel: raid6: sse2x2 2035 MB/s
Jan 30 00:22:17 mbpc kernel: raid6: sse2x4 2355 MB/s
Jan 30 00:22:17 mbpc kernel: raid6: using algorithm sse2x4 (2355 MB/s)
Jan 30 00:22:17 mbpc kernel: md: raid6 personality registered for level 6
Jan 30 00:22:17 mbpc kernel: md: raid5 personality registered for level 5
Jan 30 00:22:17 mbpc kernel: md: raid4 personality registered for level 4
Jan 30 00:22:17 mbpc kernel: bio: create slab <bio-1> at 1
Jan 30 00:22:17 mbpc kernel: md/raid:md0: not clean — starting background reconstruction
Jan 30 00:22:17 mbpc kernel: md/raid:md0: device sda operational as raid disk 5
Jan 30 00:22:17 mbpc kernel: md/raid:md0: device sdb operational as raid disk 4
Jan 30 00:22:17 mbpc kernel: md/raid:md0: device sdc operational as raid disk 3
Jan 30 00:22:17 mbpc kernel: md/raid:md0: device sdd operational as raid disk 2
Jan 30 00:22:17 mbpc kernel: md/raid:md0: device sde operational as raid disk 1
Jan 30 00:22:17 mbpc kernel: md/raid:md0: device sdf operational as raid disk 0
Jan 30 00:22:17 mbpc kernel: md/raid:md0: allocated 6386kB
Jan 30 00:22:17 mbpc kernel: md/raid:md0: raid level 6 active with 6 out of 6 devices, algorithm 2
Jan 30 00:22:17 mbpc kernel: md0: detected capacity change from 0 to 4000814792704
Jan 30 00:22:17 mbpc kernel: md: resync of RAID array md0
Jan 30 00:22:17 mbpc kernel: md: minimum _guaranteed_ speed: 1000 KB/sec/disk.
Jan 30 00:22:17 mbpc kernel: md: using maximum available idle IO bandwidth (but not more than 200000 KB/sec) for resync.
Jan 30 00:22:17 mbpc kernel: md: using 128k window, over a total of 976761424 blocks.
Jan 30 00:22:17 mbpc kernel: md0: unknown partition table
4
Create the array:
The steps in order are as follows. Of course for your RAID6 type, # of disks and disk identifiers, you'll need to tweak these lines to suit your setup:
We'll line up the chunk sizes to the XFS sizes below: 64K for improved performance. The –bitmap=internal will allow for very very fast resync's when new disks are added to replace failed ones. Instead of 5 – 8 hours, the resyncs literally took only a few minutes during testing. Check the array using:
(Optional) # mdadm –grow /dev/md0 –bitmap=internal # To add an internal bitmap later.
NOTES: To stop or start the array, issue one of the following commands: STOP: mdadm –stop /dev/md0 START: mdadm –assemble –scan
IMPORTANT: To spin down the SDD platters and power off the individual disks, to simulate disks being taken out or prior to taking out the disks, issue the following:
We will use the above methods during testing of the array prior to usage. Once built fully, our array should be marked as active:
# mdadm –detail /dev/raidmd0
/dev/raidmd0:
Version : 1.2
Creation Time : Mon Mar 26 00:06:24 2012
Raid Level : raid6
Array Size : 3907045632 (3726.05 GiB 4000.81 GB)
Used Dev Size : 976761408 (931.51 GiB 1000.20 GB)
Raid Devices : 6
Total Devices : 6
Persistence : Superblock is persistent
Intent Bitmap : Internal
Update Time : Mon Apr 2 00:59:01 2012
State : active
Active Devices : 6
Working Devices : 6
Failed Devices : 0
Spare Devices : 0
Layout : left-symmetric
Chunk Size : 64K
Name : mbpc:0 (local to host mbpc)
UUID : 2f36ac48:5e3e4c54:72177c53:bea3e41e
Events : 3213
Number Major Minor RaidDevice State
0 8 32 0 active sync /dev/sdc
1 8 64 1 active sync /dev/sde
2 8 48 2 active sync /dev/sdd
3 8 80 3 active sync /dev/sdf
4 8 16 4 active sync /dev/sdb
5 8 0 5 active sync /dev/sda #
5
Create the PV, VG and LV's.
In our case, we'll only create a 2TB LV out of the 4TB we have. We will extend this in the future as need arises (These and following steps can be done while the array is building above).
# lvm pvcreate /dev/raidmd0
# lvm vgcreate MBPCStorage /dev/raidmd0
# lvm lvcreate -L3906254360S -n MBPCBackup MBPCStorage # 2TB. Leaving the last 2TB for possible expansion and LVM / XFS resizing.
6
Create the XFS filesystem and mount the partition.
Create the XFS filesystem in this manner (The selection of size=64 and agcount=64 are the result of testing using various values that we did. For this configuration, 64 for both options for these 1TB X6 SDD's was optimal):
For XFS filesystems and RAID6, it's rather dangerous, according to readings, to have the write_cache enabled. There is the potential of metadata corruption on power failures. Disable write_cache on the disks participating in the RAID6 XFS array.
Add the following entries to the /etc/rc.local file to take effect on each reboot:
GET the block device default optimization parameters for the RAID6 array (md0), individual disks and filesystem.
Get the default parameters for the devices. In this case, for the hardware selected, the default detected are to the right behind the # (If your RAID6 array is NOT md0, substitute accordingly):
# READ cat /sys/block/md0/md/stripe_cache_size # 256
blockdev –getra $(echo $(ls -al /dev/rsd*|awk '{ print "/dev/"$NF }')) # 256
blockdev –getra /dev/md0 # 1024
blockdev –getra /dev/MBPCStorage/MBPCBackup # 1024
for mskb in $(ls -al /dev/rsd*|awk '{ print $NF }'); do cat /sys/block/$mskb/queue/max_sectors_kb; done # 512
for qdepth in $(ls -al /dev/rsd*|awk '{ print $NF }'); do cat /sys/block/$qdepth/device/queue_depth; done # 31
Record the parameters in case you'll want to put them back.
11
SET the block device default optimization parameters for the RAID6 array (md0), individual disks and filesystem.
Again, as with the write_cache parameters, add these to the /etc/rc.local file on your system so they take effect on each reboot, restart and shutdown:
# SET (rc.local file) echo 16384 > /sys/block/md0/md/stripe_cache_size
blockdev –setra 32768 $(echo $(ls -al /dev/rsd*|awk '{ print "/dev/"$NF }'))
blockdev –setra 32768 /dev/md0
blockdev –setra 32768 /dev/MBPCStorage/MBPCBackup
for mskb in $(ls -al /dev/rsd*|awk '{ print $NF }'); do echo 8192 > /sys/block/$mskb/queue/max_sectors_kb; done
for qdepth in $(ls -al /dev/rsd*|awk '{ print $NF }'); do echo 31 > /sys/block/$qdepth/device/queue_depth; done
11
Test using bonnie++ and copying files from another drive to the targer XFS RAID 6 array you've just built.
Test the array using bonnie++ (If not available, can download using yum install bonnie++):
# xfs_info /mnt/MBPCBackupx/
meta-data=/dev/mapper/MBPCStorage-MBPCBackup isize=256 agcount=64, agsize=7629408 blks
= sectsz=512 attr=2
data = bsize=4096 blocks=488282112, imaxpct=5
= sunit=16 swidth=64 blks
naming =version 2 bsize=4096 ascii-ci=0
log =internal bsize=4096 blocks=16384, version=2
= sectsz=512 sunit=16 blks, lazy-count=1
realtime =none extsz=4096 blocks=0, rtextents=0
You have new mail in /var/spool/mail/root #
Your array should now be ready. However, before one is to put any data on the new storage, some brutal testing is in order. We need to know that the array can withstand some hard hits and still tick before you can trust your files to it.
This entry was posted
on Monday, April 2nd, 2012 at 12:44 am and is filed under Network, NIX Posts, Perl, Web.
You can follow any responses to this entry through the RSS 2.0 feed.
You can leave a response, or trackback from your own site.
11 Responses to “HTPC / Backup Home Server Solution using Linux”
Thanks for posting. Just added the testing numbers so feel free to have a look and judge yourself.
> logbsize and delaylog
I ran another test with logbsize=128k (couldn’t find anything for delaylog in my mkfs.xfs man page so I’m not sure if that’ll do anything). Little to no difference in this case on first glance. Watch out for the results at some point for a closer look.
One consideration here is that eventually I would grow the LVM and XFS to fill up to 4TB. I’ll be doing this soon Potentially in the future, I may try to grow this array as well to something well over 8TB (Yet to see how to do that). I’m not sure if XFS would auto-adjust in those cases for optimal values for those capacities and the link didn’t touch on that topic.
All in all, I can still run tests on this thing recreating the FS if I need to so feel free to suggest numbers you’d be interested to see. I might leave this topic open for a week or two to see if I can think of anything else or if I’m missing anything. For my setup, having anything > 125MB/s is a bonus as the network is only 1GB/s with that theoretical max.
[…] could be done safely enough like this guy did and with RAID6 as well with SSD type R/W’s no less. Your size would be limited to the size of the […]
Thank you for posting this blog. I was getting desparate. I could not figure out why I could not stop the RAID1 device. Even from Ubuntu Rescue Remix. The LVM group was being assembled from the failed raid. I removed the volume group and was finally able to gain exclusive access to the array to stop it, put in the new disk and rebuild the array.
[…] we'll use for this is the APCUPSD daemon available in RPM format. We've set one up for our HTPCB server for a home redundancy / backup solution to protect against power surges and bridge the […]
[…] every time while transferring my files. At the point, I not only lost connectivity with the HTPC+B but also my web access most of the time. Here are the culprits and here's how we went […]
[…] removed the cable and the adapter and only used a 2 foot cable to my HTPC+B system I've just configured. Voila! Problem solved. Ultimately, it's […]


Hi,
Great post. You don’t need to specify the parameters when creating the XFS file system, see http://xfs.org/index.php/XFS_FAQ#Q:_I_want_to_tune_my_XFS_filesystems_for_.3Csomething.3E and http://www.spinics.net/lists/raid/msg38074.html . Of course, YMMV.
Did you run those benchmarks while the array was resyncing?
Hey Mathias,
Thanks for posting. Just added the testing numbers so feel free to have a look and judge yourself.
> logbsize and delaylog
I ran another test with logbsize=128k (couldn’t find anything for delaylog in my mkfs.xfs man page so I’m not sure if that’ll do anything). Little to no difference in this case on first glance. Watch out for the results at some point for a closer look.
One consideration here is that eventually I would grow the LVM and XFS to fill up to 4TB. I’ll be doing this soon Potentially in the future, I may try to grow this array as well to something well over 8TB (Yet to see how to do that). I’m not sure if XFS would auto-adjust in those cases for optimal values for those capacities and the link didn’t touch on that topic.
All in all, I can still run tests on this thing recreating the FS if I need to so feel free to suggest numbers you’d be interested to see. I might leave this topic open for a week or two to see if I can think of anything else or if I’m missing anything. For my setup, having anything > 125MB/s is a bonus as the network is only 1GB/s with that theoretical max.
Cheers!
TK
[…] could be done safely enough like this guy did and with RAID6 as well with SSD type R/W’s no less. Your size would be limited to the size of the […]
Thank you for posting this blog. I was getting desparate. I could not figure out why I could not stop the RAID1 device. Even from Ubuntu Rescue Remix. The LVM group was being assembled from the failed raid. I removed the volume group and was finally able to gain exclusive access to the array to stop it, put in the new disk and rebuild the array.
Nice job.
Best,
Dave.
[…] we'll use for this is the APCUPSD daemon available in RPM format. We've set one up for our HTPCB server for a home redundancy / backup solution to protect against power surges and bridge the […]
[…] every time while transferring my files. At the point, I not only lost connectivity with the HTPC+B but also my web access most of the time. Here are the culprits and here's how we went […]
[…] removed the cable and the adapter and only used a 2 foot cable to my HTPC+B system I've just configured. Voila! Problem solved. Ultimately, it's […]
[…] them from system to system to avoid choppy video / sound and also to accommodate the needs of our HTPC+B solution through file […]
[…] Linux Networking: Persistent naming rules based on MAC for eth0 and wlan0 Linux: HTPC / Home Backup: MDADM, RAID6, LVM, XFS, CIFS and NFS […]
[…] at this point and 4:15 minutes have passed). While this was going on, we are referencing our HTPC page for […]
[…] HTPC, Backup & Storage […]